
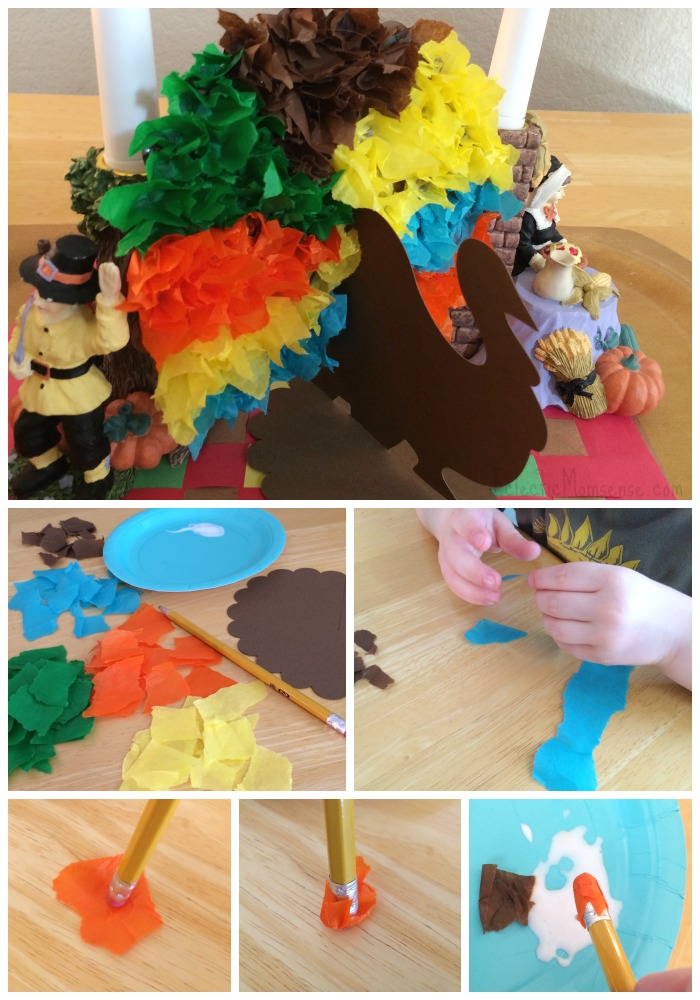
This fall season I set out to share some of my favorite crafts with my little artist. We’ve been playing a lot with tissue paper and construction paper; using old techniques with new technology. Cricut recently sent me some card stock with beautiful Fall colors and their new tool set. We’ve been having fun cutting and getting ready for the holiday season. Our first project was a tissue turkey centerpiece.
Supplies:
Tissue Paper
Cardstock
School Glue
Pencil
- Start by cutting out your turkey using your favorite paper cutter. I used the Cricut Close to My Heart- Artiste cartridge to cutout the turkey and fan of feathers. The base is a simple scalloped circle.
- Next have your little one rip tissue paper into small squares about 1″x1″. This is a great fine motor activity for little ones.
- Time to put your feathers on. Press the tip of a pencil eraser into the middle of each tissue square. Gather and twist the ends up and around the pencil eraser. Dip the bottom of the tissue paper in school glue. Press down firmly to adhere and release your tissue rosette onto the card stock. Repeat, switching colors to create that glorious turkey fan of feathers. Alternatively you could have your kiddos ball up the tissue and press in glue.
- While your feathers dry. Cut a slit in the back of the scalloped circle. Slide the back of your turkey in. Fold the bottom of the turkey under and adhere with glue. Place the fan of feathers on the turkeys back.
- You might need to reinforce the bottom with beads of hot glue. The weight of the feathers might fall over. We just propped ours on the candlesticks for support.
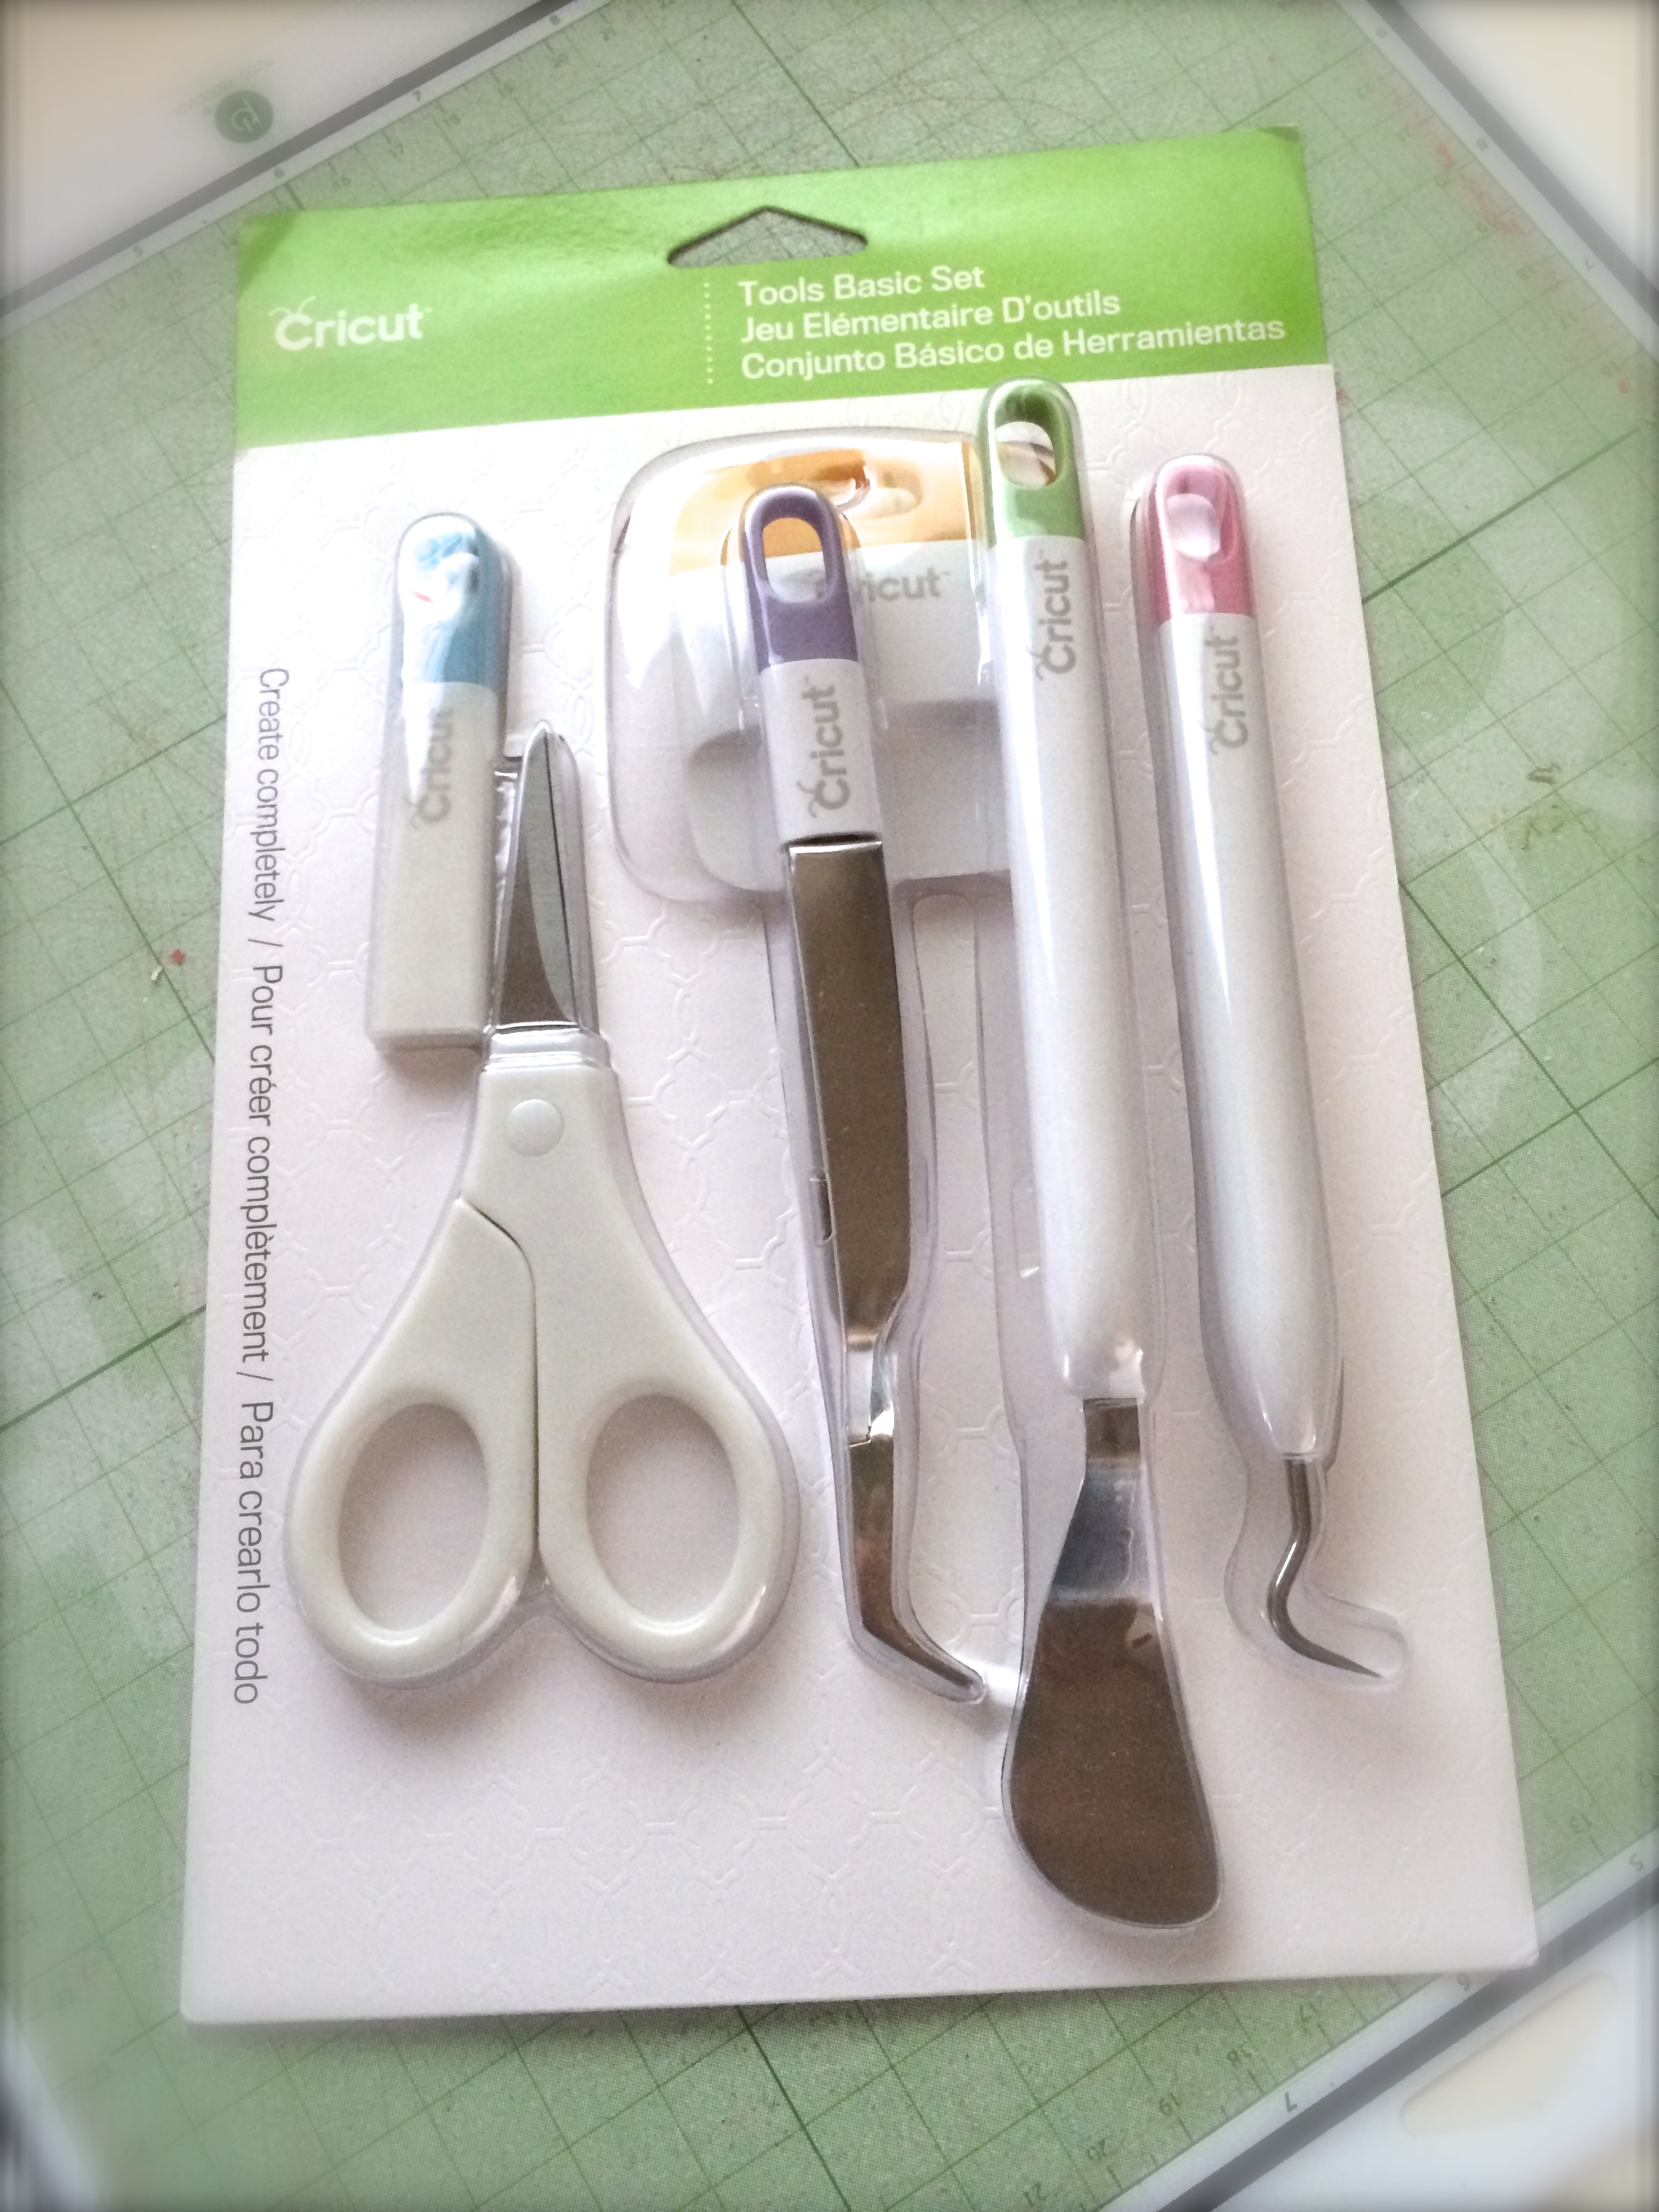
The new basic Cricut toolset (affiliate link) is the perfect crafting companion. It comes with 5 tools to help you lift, cut, and clean. My favorite tool is the scraper. It’s perfect for cleaning up your mat from all the small cuts.
[…] Tree / Meaningful Mama13) Hand print wreath / Fun Handprint Art Blog14) Turkey Jar / Artsy Momma15) Tissue Paper Turkey Centerpiece / Eclectic Momsense16) Cereal Box Mayflower / Crafts by Amanda17) Finger Print Napkin Rings / […]