I am lucky enough to have a good friend over at OurCrazyBoys who introduces me to opportunities like Collective Bias and Social Fabric. This project reflects my first attempt at completing an Elmer’s Glue n Glitter Challenge. Enjoy the amateur photography and crafting as I take you on a journey to creating your very own Mickey Mouse Clubhouse “Ball Toss”.
—————————————————————-
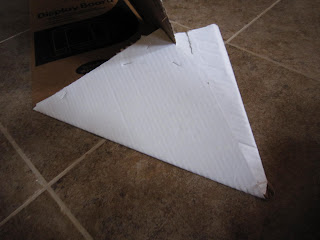
My perfectionist comes out when completing creative projects sometimes. In this case I didn’t want to spend $4 on a Tri-Fold board and completely mess up. I created a model out of printer paper and got creative and borrowed Aiden’s shape sorter for the cutouts
.
Although, Aiden was a bit young for this project you will see he participates every step of the process. In this photo he’s watching Yo Gabba Gabba helping me while I plan out my shopping trip to Wal-Mart.
1. (not pictured) Cut off one of the flaps and save for later.
2. Find the center of your Elmer’s Tri-Fold Board
3. Using a compass made from string and a pencil mark an outline of your Mickey head. It should take up most of the board.
(not including flap).
4. Cut out your circle being careful not to cut through the bottom flap. Leave at least 12 in. attached to the flap.
5. Mark and cut your shapes.
I used various kitchen bowls to trace my shapes.
Next, you want to create the base for your frame to rest on.
6. With the flap you left attached fold back at an angle towards the frame. Cut a slit for the frame to sit in. Do the same on both sides.
7. Take the remaining flap (brown section above) and fold up and over the first fold. Staple in place and trim the excess. You could also use an extra strength bond, but I couldn’t find any at the time.
Don’t ask me how I figured it out, but it should look like this when you are done. If you want to add extra stability create a picture frame stand and attach to the back of the frame in the middle.
7. Coat your Mickey head with Black paint.
At this point Aiden was creating a masterpiece
on his makeshift easel we created together.
8. With the flap you cutoff earlier trace and cutout 2 large circles (about 15 inches) for the ears. Paint the ears and attach using staples or Elmer’s extra strength Craft Bond. I found it easiest to paint the ears partially and then attach so I could paint over and cover up the staples.
9. Measure your ribbon against each shape and cut to size.
10. Using a glue gun or Craft Bond attach your ribbon around the rim of each shape.
11. To cover up the support stand cut out some green paper to look like grass. Attach using Elmer’s Disappearing Purple Glue Stick.
The finished project! I added leftover ribbon at the top to make a handle for carrying.
Variation: Use pinks and purples and add a bow to turn your game into a Minnie Ball Toss.
Checkout more from my shopping trip.
Products Used:
Elmer’s Disappearing Purple Glue Stick
Elmer’s Corrugated Tri-Fold Board
This project has been compensated as part of a social shopper insights study for Elmer’s #GlueNGlitter and #CollectiveBias all opinions are my own.


